Pixpa’s advanced color customization tool allows you to enhance the visual appeal of your website by applying solid colors, linear gradients, and radial gradients to your sections and text.
This provides you with a high level of creative control when designing your site’s background, headings, and paragraph text.

In this article:
- Accessing the Color Panel
- Color Type Options
- Gradient Stops
- Rotation Slider
- Radial Gradient Shape Options
- Color Picker & Hex Code input
- Opacity Slider
- Where you can use Color Options
Accessing the Color Panel
- Hover the cursor over the section that you want to edit and click on Edit Section (1) option.

- Under the Colors tab, you will see the option to change the Background color, Heading Text Color, and Para Text Color.
- Click on the Custom Color (2) option next to the element which you want to edit.
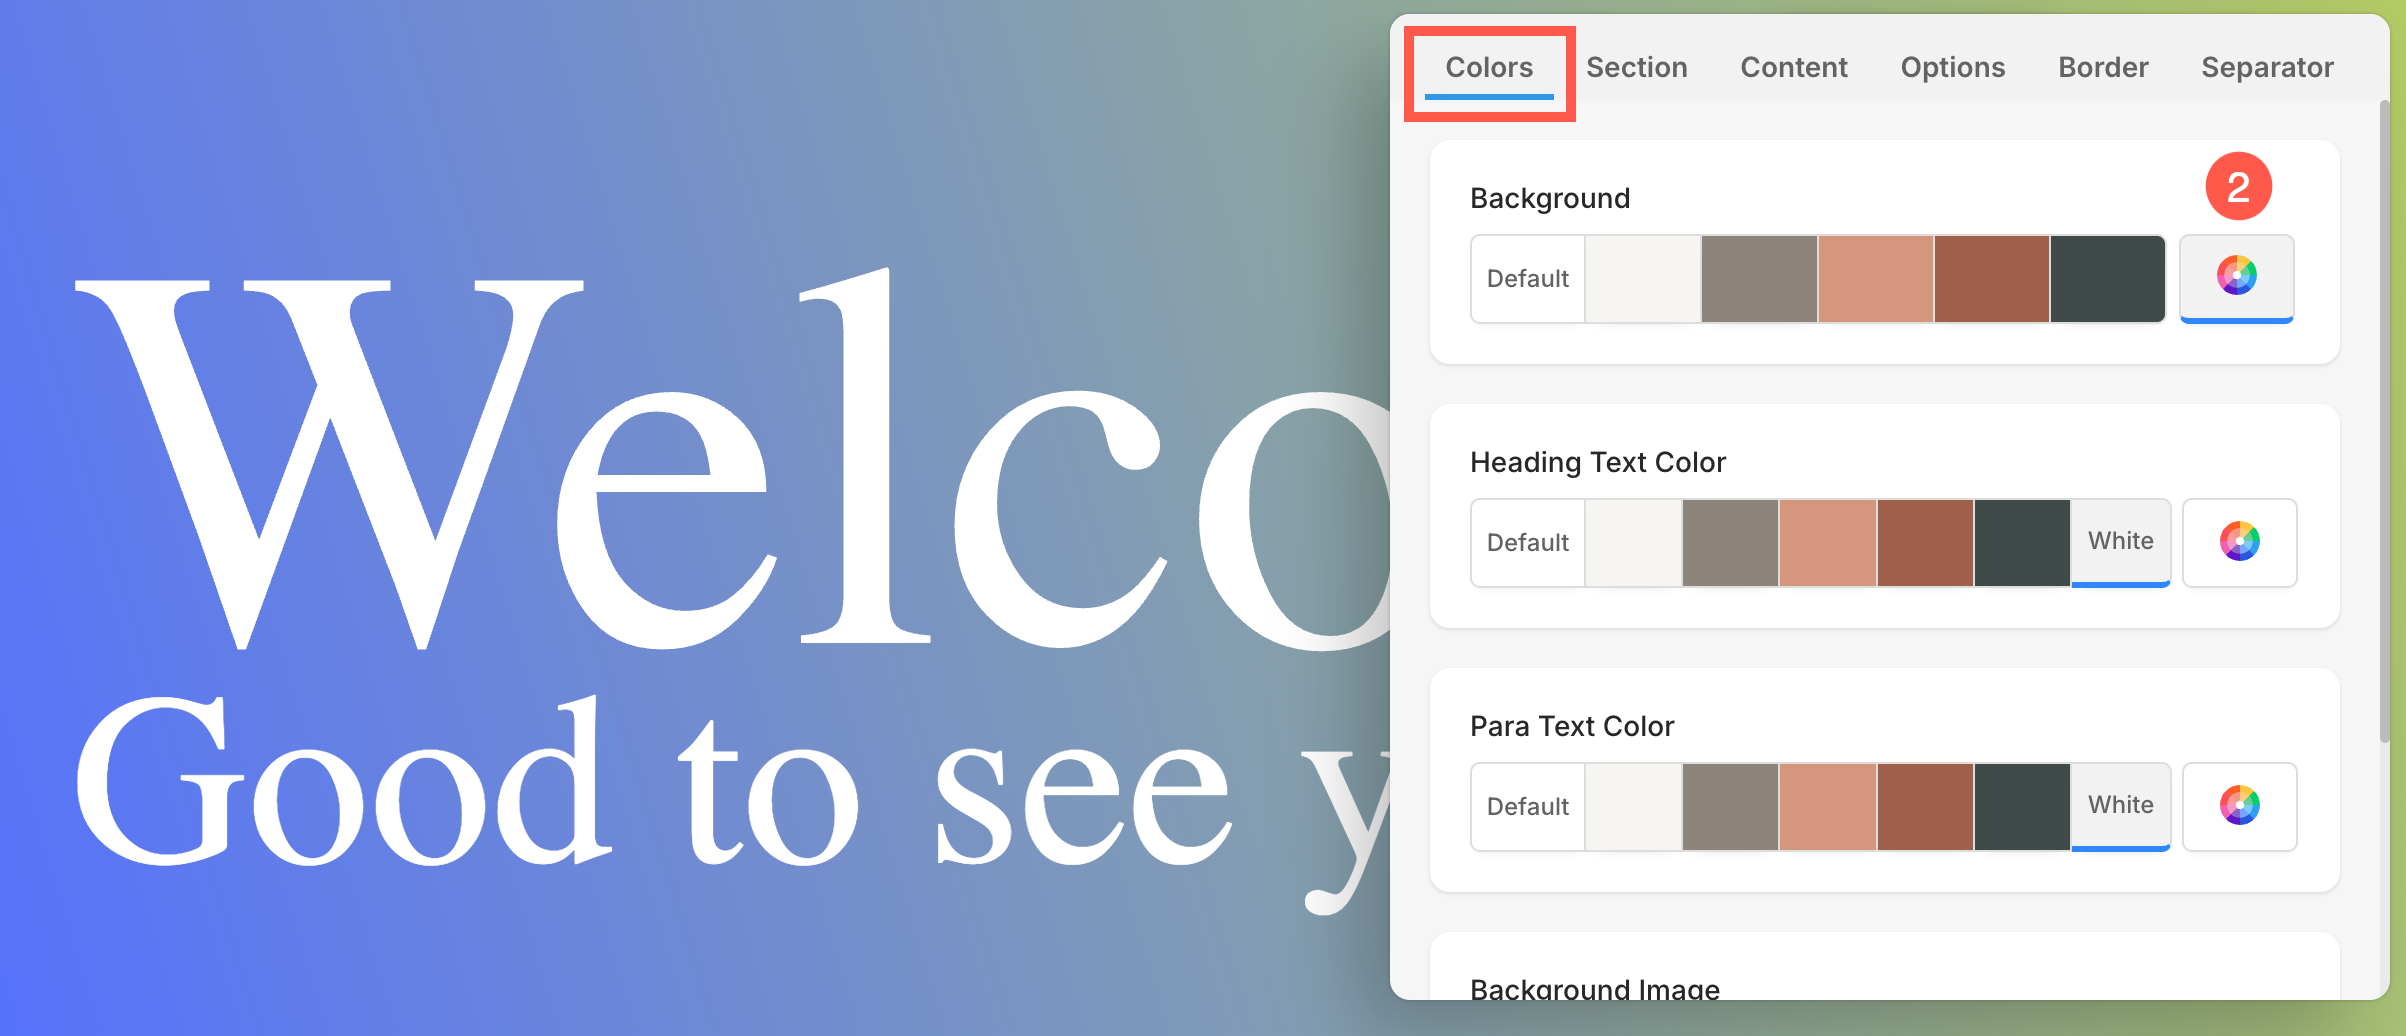
- A new popup will open up from where you can customize the color for the selected element.
Color Type Options
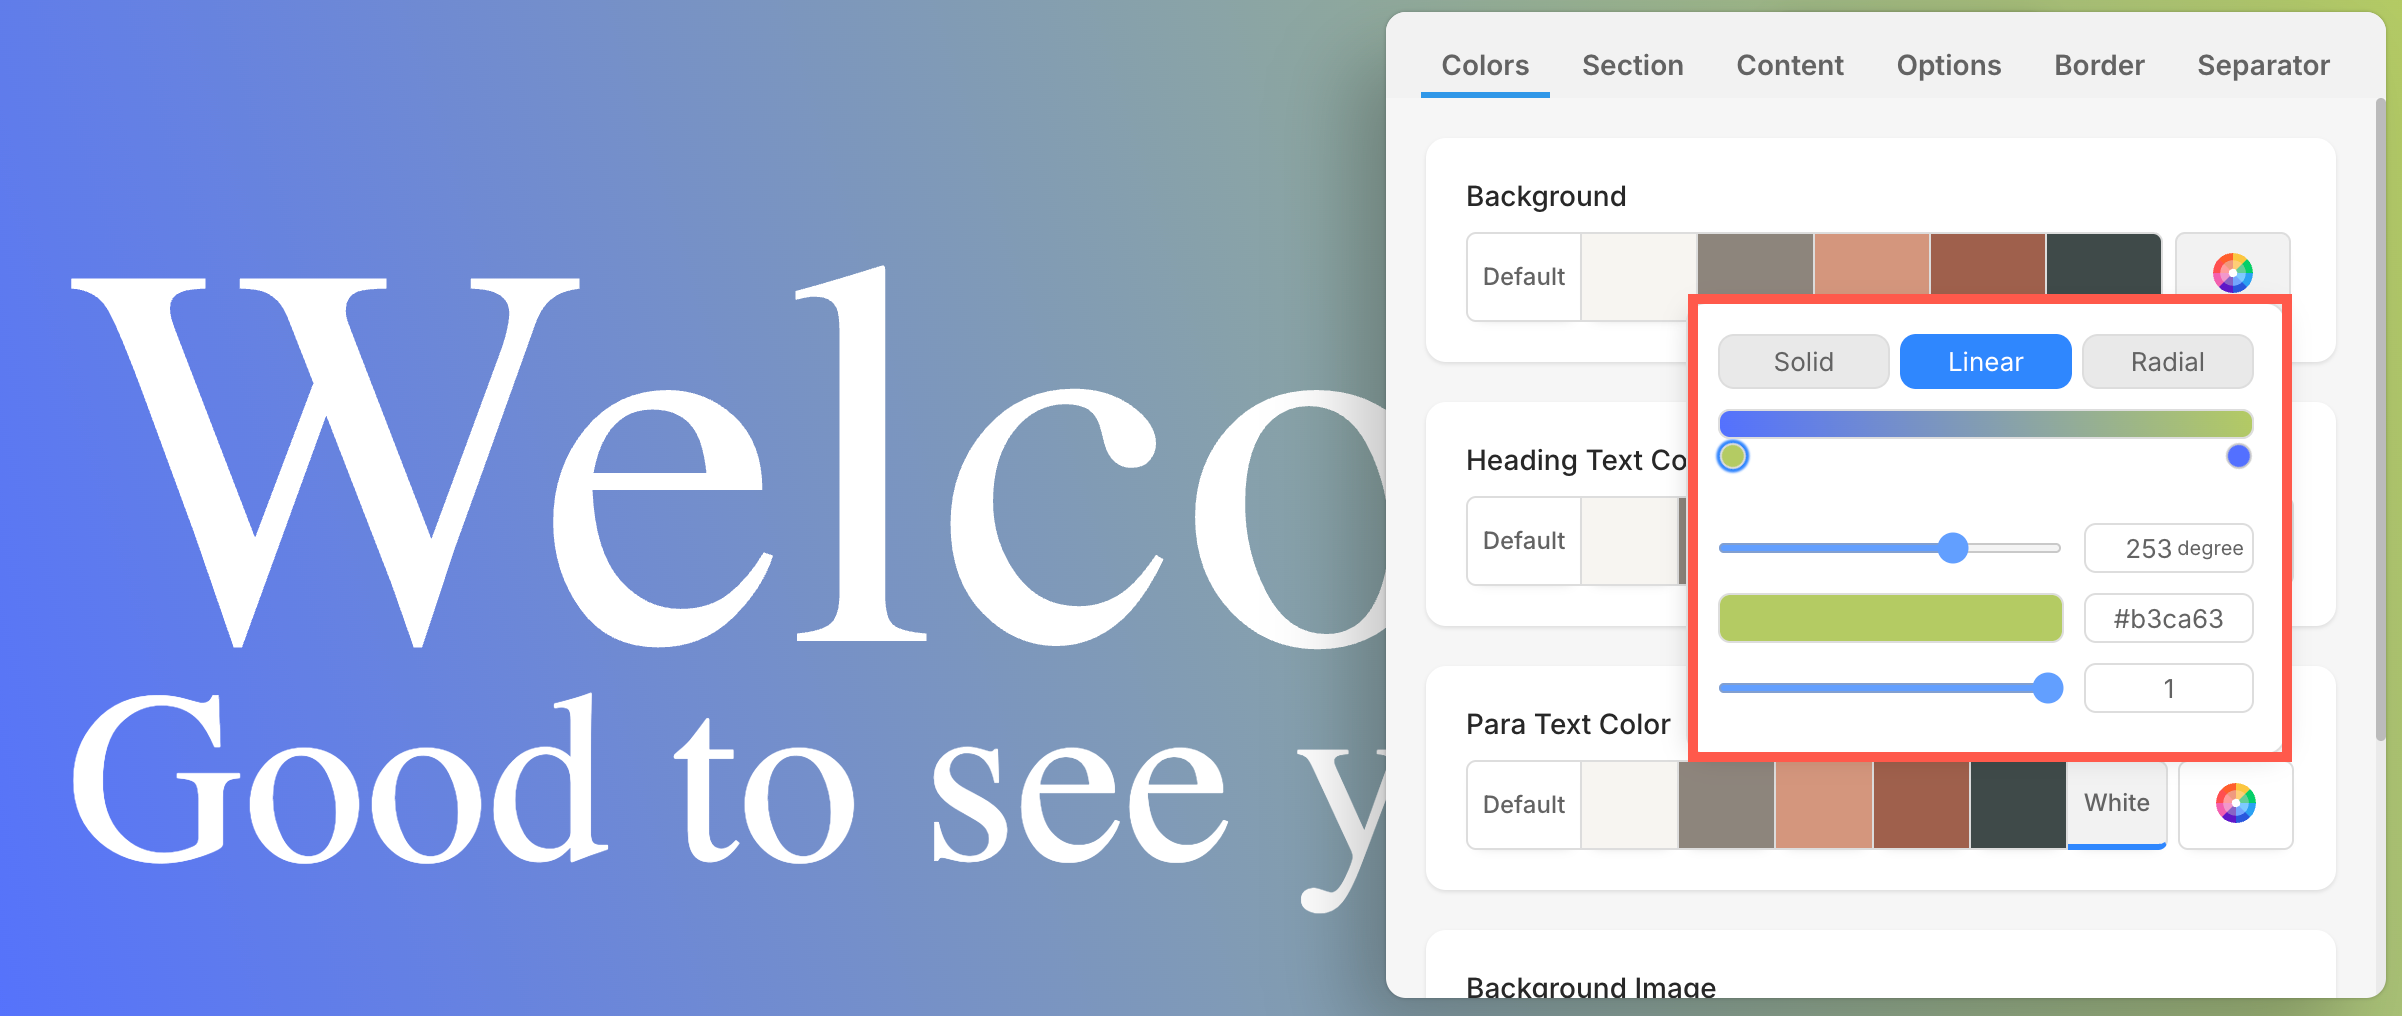
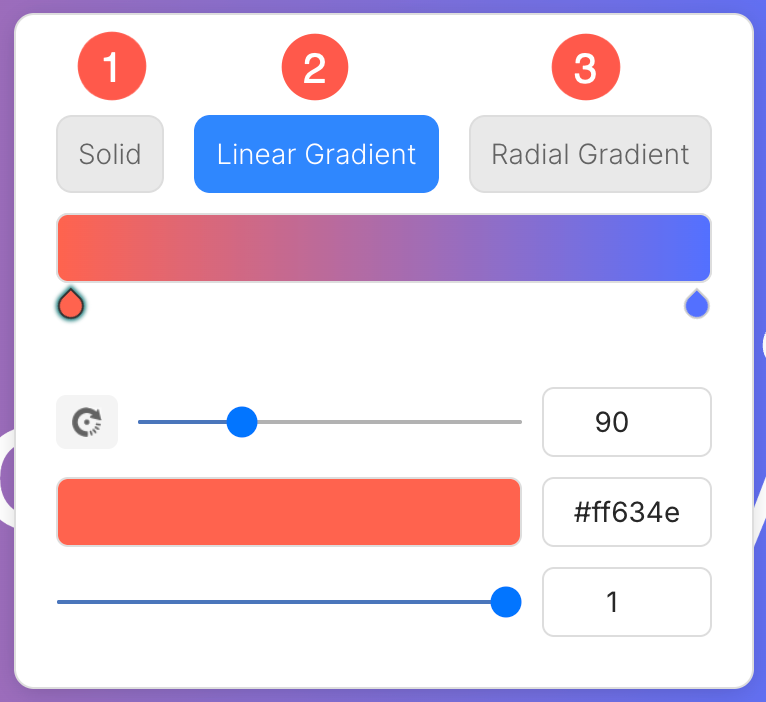
At the top of the color panel, you’ll see three options:
- Solid: Apply a single, uniform color to the selected area. This is a simple, clean option for users who want a consistent color block.
- Linear Gradient: Creates a gradual blend between two or more colors along a straight line. You can control the direction of this gradient using the rotation slider.
- Radial Gradient: Produces a circular color transition radiating from a central point. This is ideal for spotlight-style effects or to draw attention to a specific area.
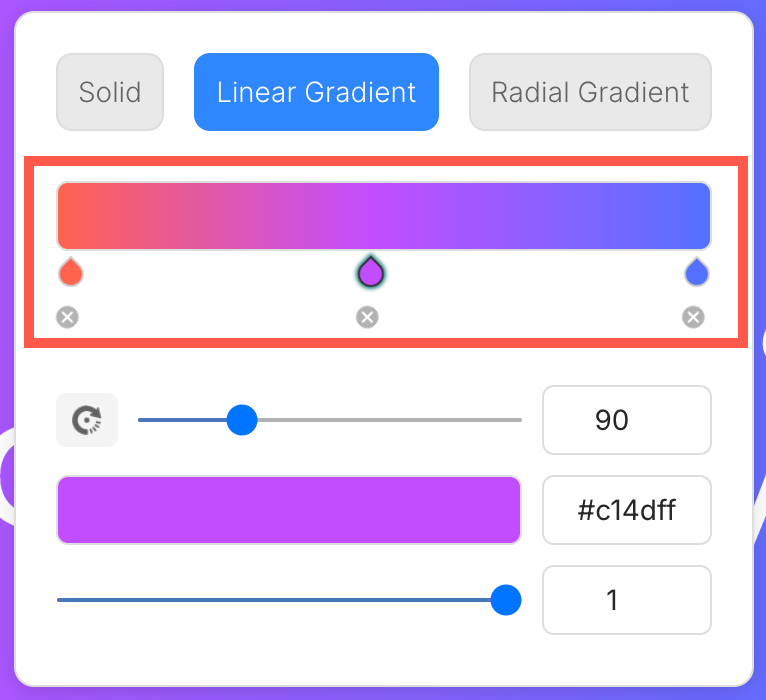
Gradient Stops
When you select either Linear or Radial Gradient, you’ll see a horizontal color bar where you can manage your gradient stops:
- Each gradient stop (represented by a droplet icon) marks a color point in the gradient.
- Click on a stop to change its color using the color picker or by entering a hex code.
- You can add multiple stops to create smooth multi-color transitions.
- Click the small “x” icon below a stop to remove it.
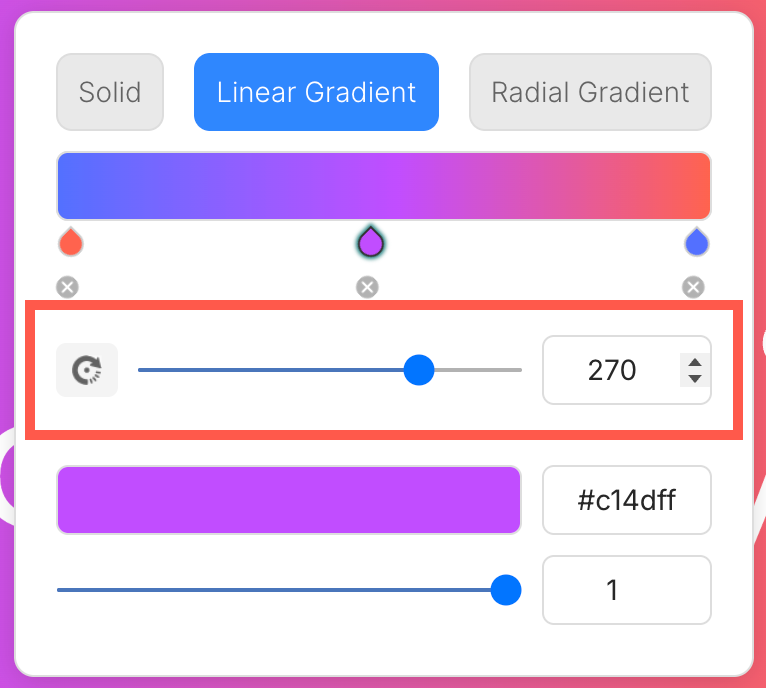
Rotation Slider (Linear Gradient Only)
For linear gradients, use the rotation slider to change the angle of the gradient. This allows you to rotate the color direction from horizontal (0°) to vertical (90°) or any custom angle up to 360°.
- A preview of the gradient will adjust in real-time as you move the slider.
- The current angle is shown in a numeric field next to the slider (e.g., 270°).
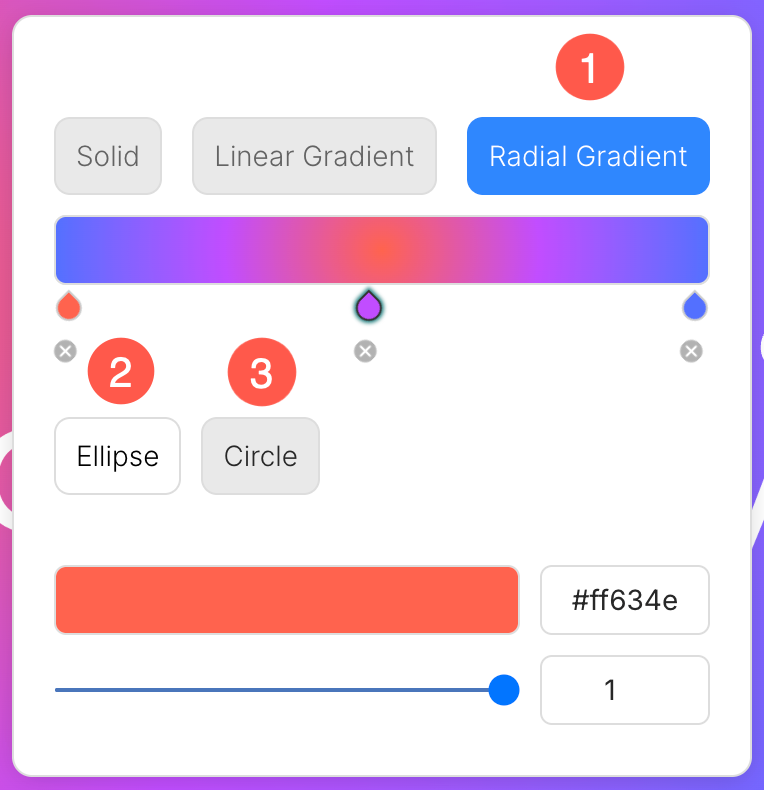
Radial Gradient Shape Options
When you select Radial Gradient (1), two shape options will appear beneath the gradient preview:
- Ellipse: Produces an elongated radial gradient with horizontal or vertical stretch. This is useful for broader gradient coverage or asymmetrical designs.
- Circle: This creates a perfectly round gradient radiating from the center (or selected focal point). Ideal for spotlight-style backgrounds or to draw the eye to a central element.
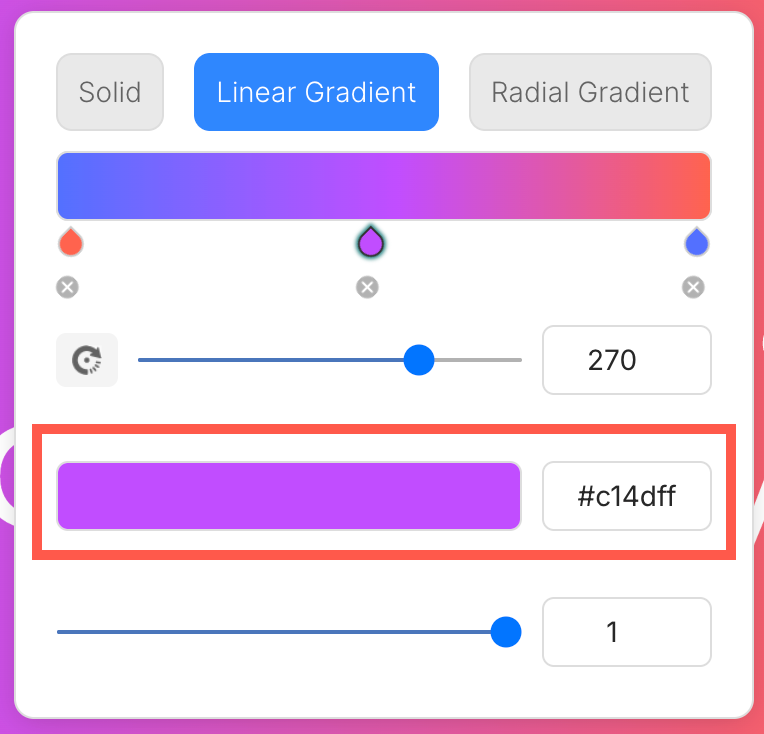
Color Picker and Hex Code Input
Whether you’re working with a solid color or individual gradient stops:
- Use the color picker to choose a color visually.
- Alternatively, enter a hex color code manually (e.g., #c14dff) for precise color control.
If you’re using a gradient, selecting a stop allows you to define its specific color using this tool.
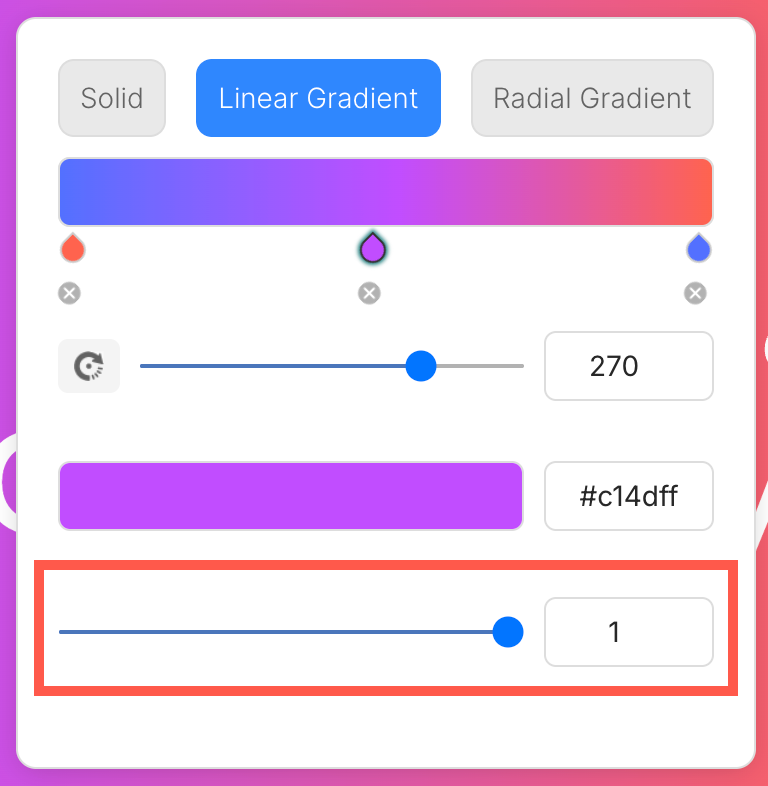
Opacity Slider
At the bottom of the panel, you’ll find a slider to control opacity:
- Set the transparency level of the selected color or gradient stop.
- A value of 1 means fully opaque, while 0 is fully transparent.
This is useful for creating layered visual effects or soft background overlays.
Where You Can Use These Color Options
These advanced color tools are available in the following areas:
- Section Background
- Heading Text
- Paragraph Text
Each area has its own color tab, so you can style different components independently for greater visual flexibility.