If you have a few contributors to your website and wish to provide permitted access to them, then the Contributors feature provides you with the perfect solution.
In case you are building a website for your client, you can provide website, and design section edit access so that they can customize the website on their own.
The Contributors feature enables you to allow any person to edit any section of your Pixpa account. You can specify and give any permissions you prefer.
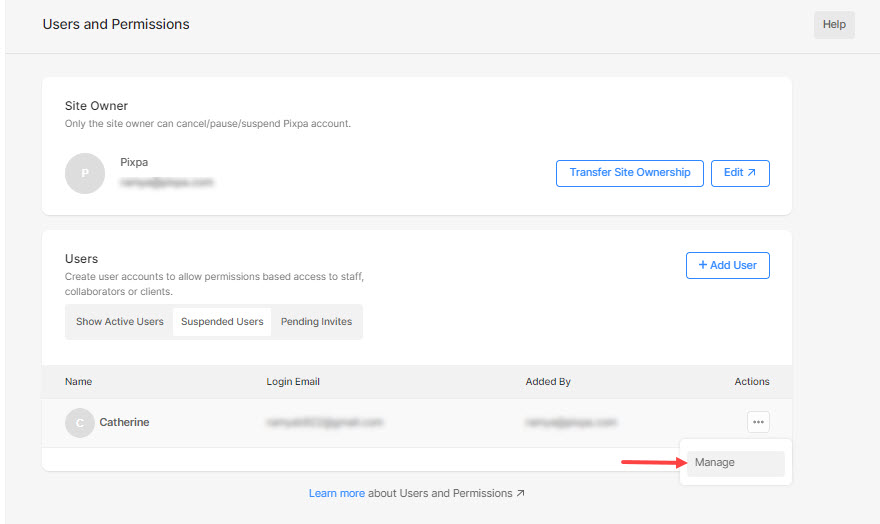
The Site owner is the person who owns the Pixpa account and the website. He/She can create user accounts to allow permissions-based access to staff, collaborators, or clients.
He/She can anytime suspend the user or remove the user completely.
The User is the person who gets edit access to permitted sections by the owner of the website. The user will receive the email invite. If the user does not possess a Pixpa account earlier, he can sign up and edit the permitted website from the email invite.
Irrespective of the owner or the user making changes to the website/account, the changes will be saved and published right away.
In this article:
- Add a user and give permissions.
- Different States of User.
- Manage or alter the permissions of the Active User.
- Manage or alter the permissions of Suspended User.
Add a user and give permissions:
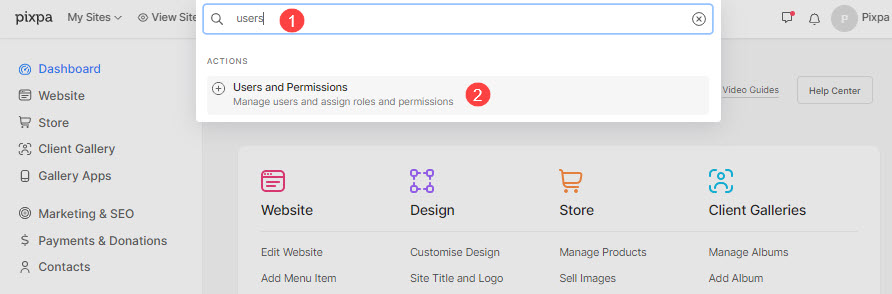
- Enter users (1) in the Search Bar.
- From the related results, click on the Users and Permissions option (2) under Actions.
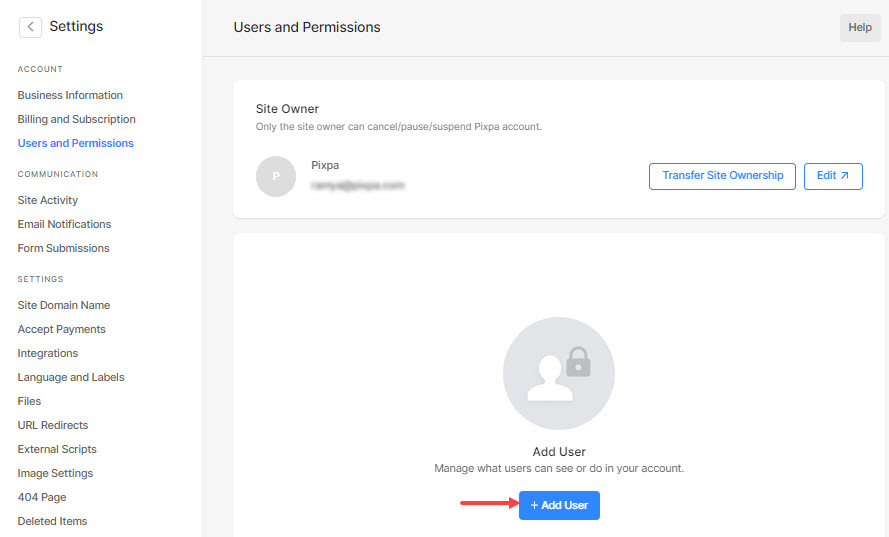
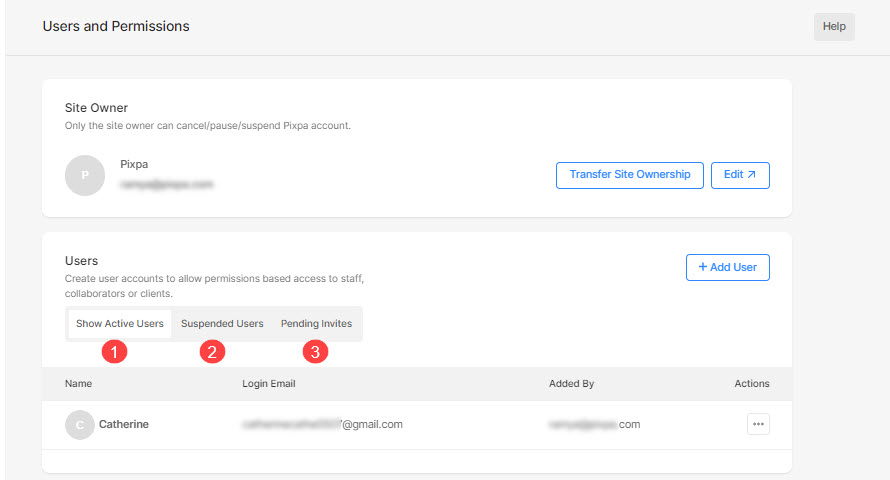
- You will now reach the Users and Permissions page.
- Click on the + Add User button to add a new user.
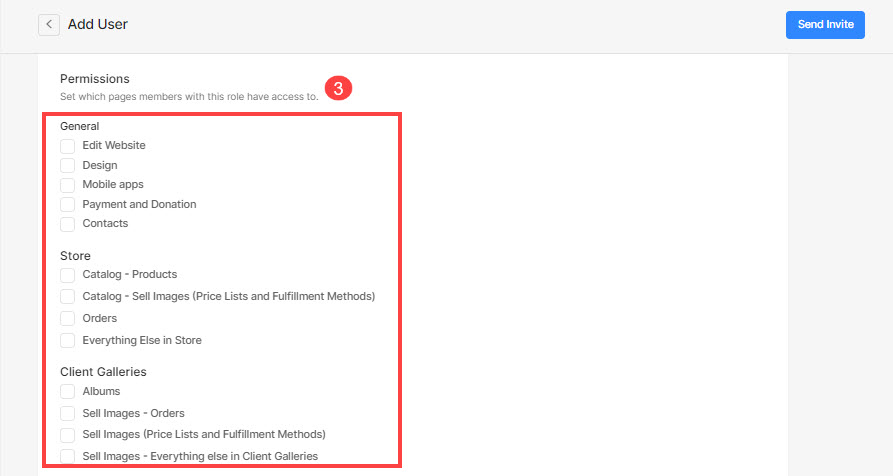
Now, you can specify the following fields:
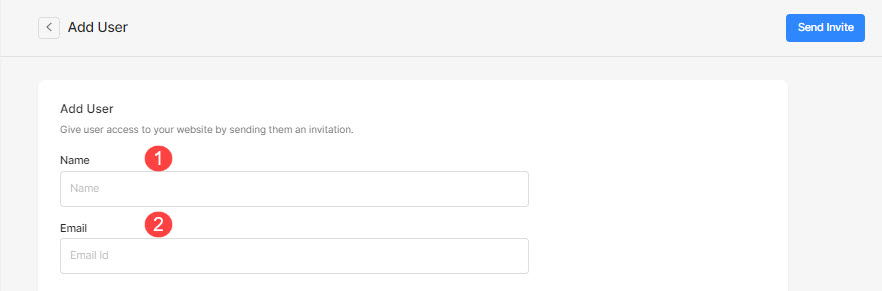
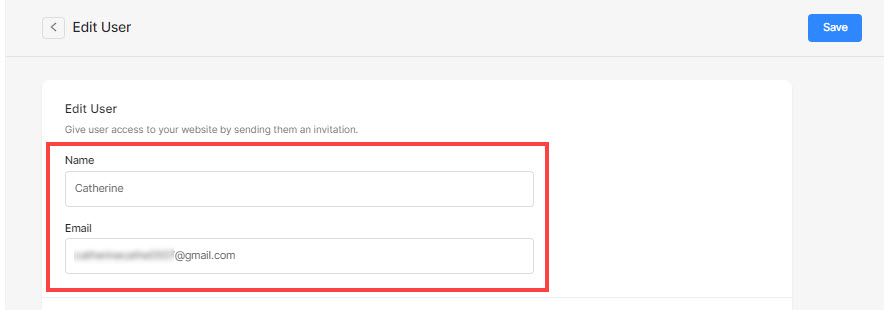
- Name – Enter the name of the user.
- Email – Enter the email address of the user. The invite will be sent to this email address.
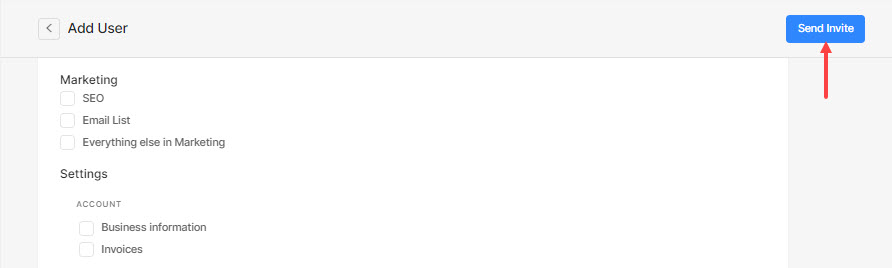
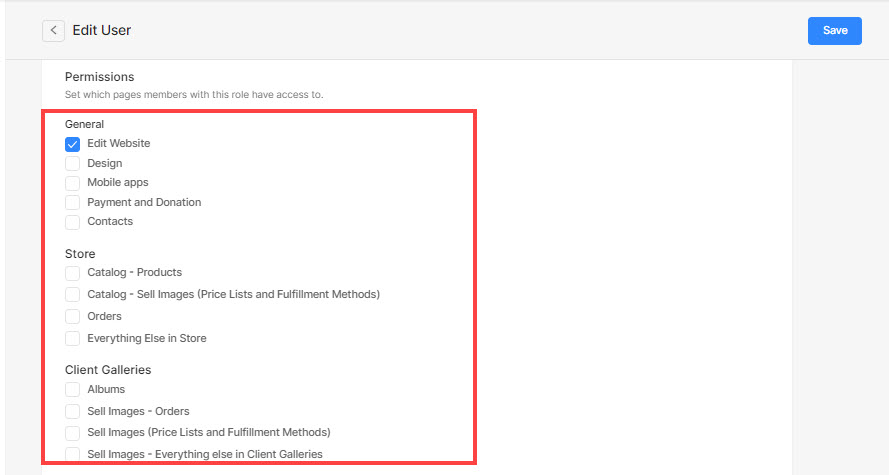
- Choose the permissions to be given to the user:
- General
- Store
- Client Galleries
- Marketing
- Settings
- Administration

- Once you fill in all the above information, click on the Send Invite button.
- The email invite will be sent to the specified email address.
- If the user accepts the edit request, he/she will be able to edit the permitted sections.
- In case he/she declines, the user will be added to the pending invites list.
Different States of User
As the owner adds users and gives different permissions, the user can have 3 different states:
- Active User – When the user accepts the edit request.
- Suspended – When you suspend the user as shown below.
- Pending – When the user declines the edit request.
Manage the user permissions
Once you have sent the email invite (with few permissions) to the user, you can always manage the permissions.
Manage or alter the permissions of Active User:
- Click on the menu icon and then, on the Manage button.
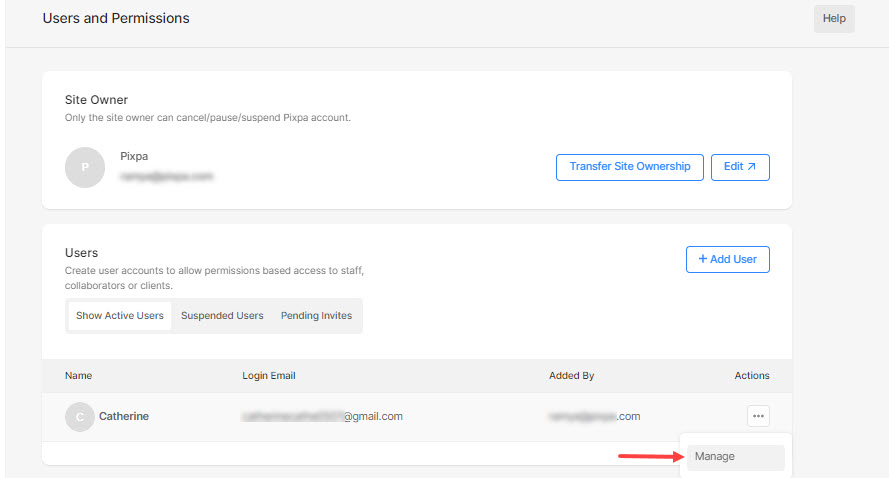
You will now reach the Edit User page where you can manage the:
- Name and Email
- Permissions
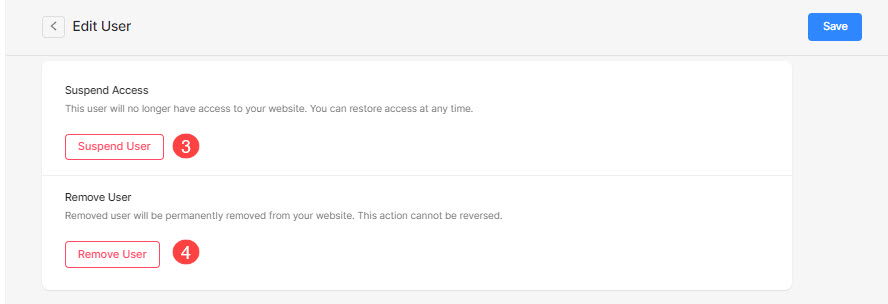
- Suspend User – This user will no longer have access to your website. You can restore access at any time.
- Remove User – The user will be permanently removed from your website. However, you can add him/her as a new user and give permissions.
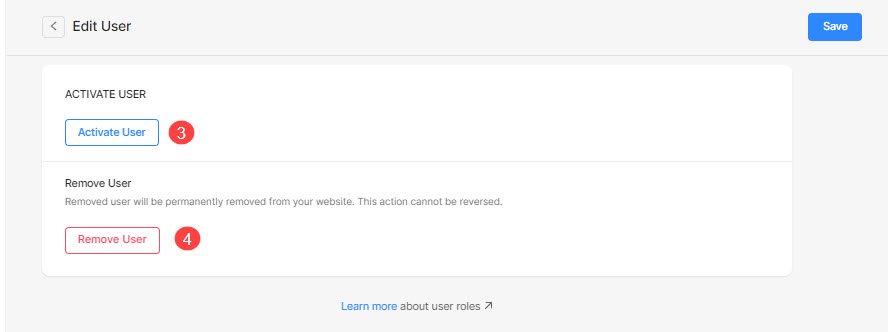
Manage or alter the permissions of Suspended User:
- Go to the Suspended Users tab and click on the menu icon of a particular user.
- Then, click on the Manage button.
You will now reach the Edit User page where you can manage the:
- Name and Email
- Permissions
- Activate User – Make the suspended user active. The user will be able to re-access and edit the permitted sections again.
- Remove User – The user will be permanently removed from your website. However, you can add him/her as a new user and give permissions.