Product options let you set up options with different prices for a single product.
For example, a T-shirt can have product options based on size (S, M, L, XL) or a print can have product options based on sizes (12×12, 20×20, 30×30 inches). Each option/variant can have a different price if required.
Product options can be created when you create a product or edit any existing product.
In this article:
- Add product options.
- Add multiple product options.
- Add Images to variants.
- Live example with multiple product options.
To add product options, follow these steps:
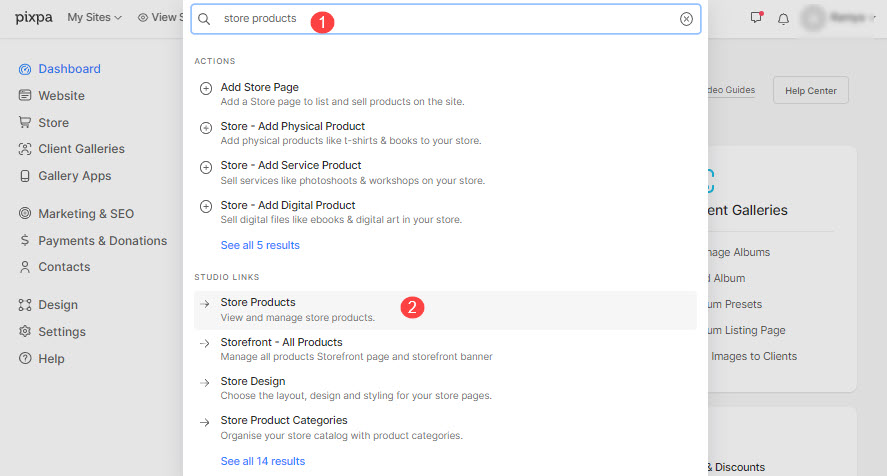
- Enter Store products (1) in the Search Bar.
- From the related results, click on the Store products option (2) under Studio Links.
- You will now reach the Products page.
- On this page, you would see the listing of all the products that already exist.
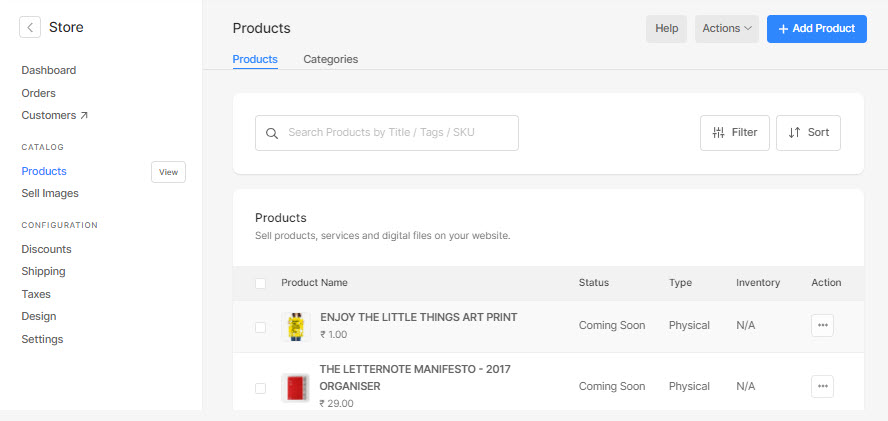
- Click on the product title to edit that particular product or click on + Add Product button to create a new product with options.
- On the product creation/edit page, scroll down the page to view the enable product options button.
- Click on the Add Option button which will open the pop-up to specify your variant details.

Here you will see the options to:
- Specify your Option Title (1).
- Choose the display format (2) type of the variant options from Dropdown, Radio Buttons, or Tabs
- Specify your product variant Options (3) like Small, Medium, and Large for sizes.
- If you want to add more options to the variant, click on the + Add Option button (4) and then fill in the option.
- Hit the Save button (5) to save changes.

- After specifying the option label, and options, you need to enter the product price (1), compare at price (2), Qty (3), SKU Code (4), Weight (5), and Status (Active or not) (6) of particular options.

- If you have enabled the option to manage the inventory, you will see the Quantity field where you can specify the inventory of the variants.
Have a look at the product options in the store:
The options you just created will show up as dropdown/radio buttons/tabs on the product page.
Visitors can select the option they want to buy from the available options. The selected option price will be applied to the product and shown to your customer.

Add multiple product options
Pixpa gives you the option to add multiple levels of variants like you can define the first variant option to be on size and the second on the color.
To add more product options:
- Click on the + Add Option button next to Enable Product Options.
- It will open a pop-up where you can specify the option name, add options and choose the type of display (for the options).

- Click the Save button to save the changes.
- You can repeat the same process as suggested above to add multiple product options to a product.
Add Images to variants
- Once you have created product variants, they will be shown as below:
- Click on the image of the variant to upload or set the variant image.

- You will now see a popup where you can choose between the product images (already uploaded) (1).
- Or you can click on the + Add Image button (2) and upload a new image for the variant.
- Finally, hit the save button (3).

- Once you are done, the image shows up against the variant.

- Now, when you switch and view the different product variants on live website, the images change and show the particular variant image.
A live example of multiple product options
Here’s a live product with multiple variants of Size and Mounting Options.

To achieve similar product variants for any of your products, follow these steps:
- As directed above, create two new options namely, Size and Mounting Options.
- Create a few variants for each option (i.e., Size and Mounting Options) as shown below.
- For instance, for the first product option, Option Title (1) can be Size, and the Options (2) can be Fine Art Print A4 (without frame – rolled), Fine Art Print A3 (without frame – rolled), etc.

- For the second product option, Option Title (1) can be Mounting Options, and the Options (2) can be Matboard, Styrene, etc.

- Once, you have added the options, option titles and saved the changes, you would see them as below:

- You would see the product variants as below:

- Now, you need to specify the product price, compare at price, SKU Code, Weight, Qty, and Active state of particular variants.
- So that when the particular variant is chosen on the product page, the respective details get displayed.